

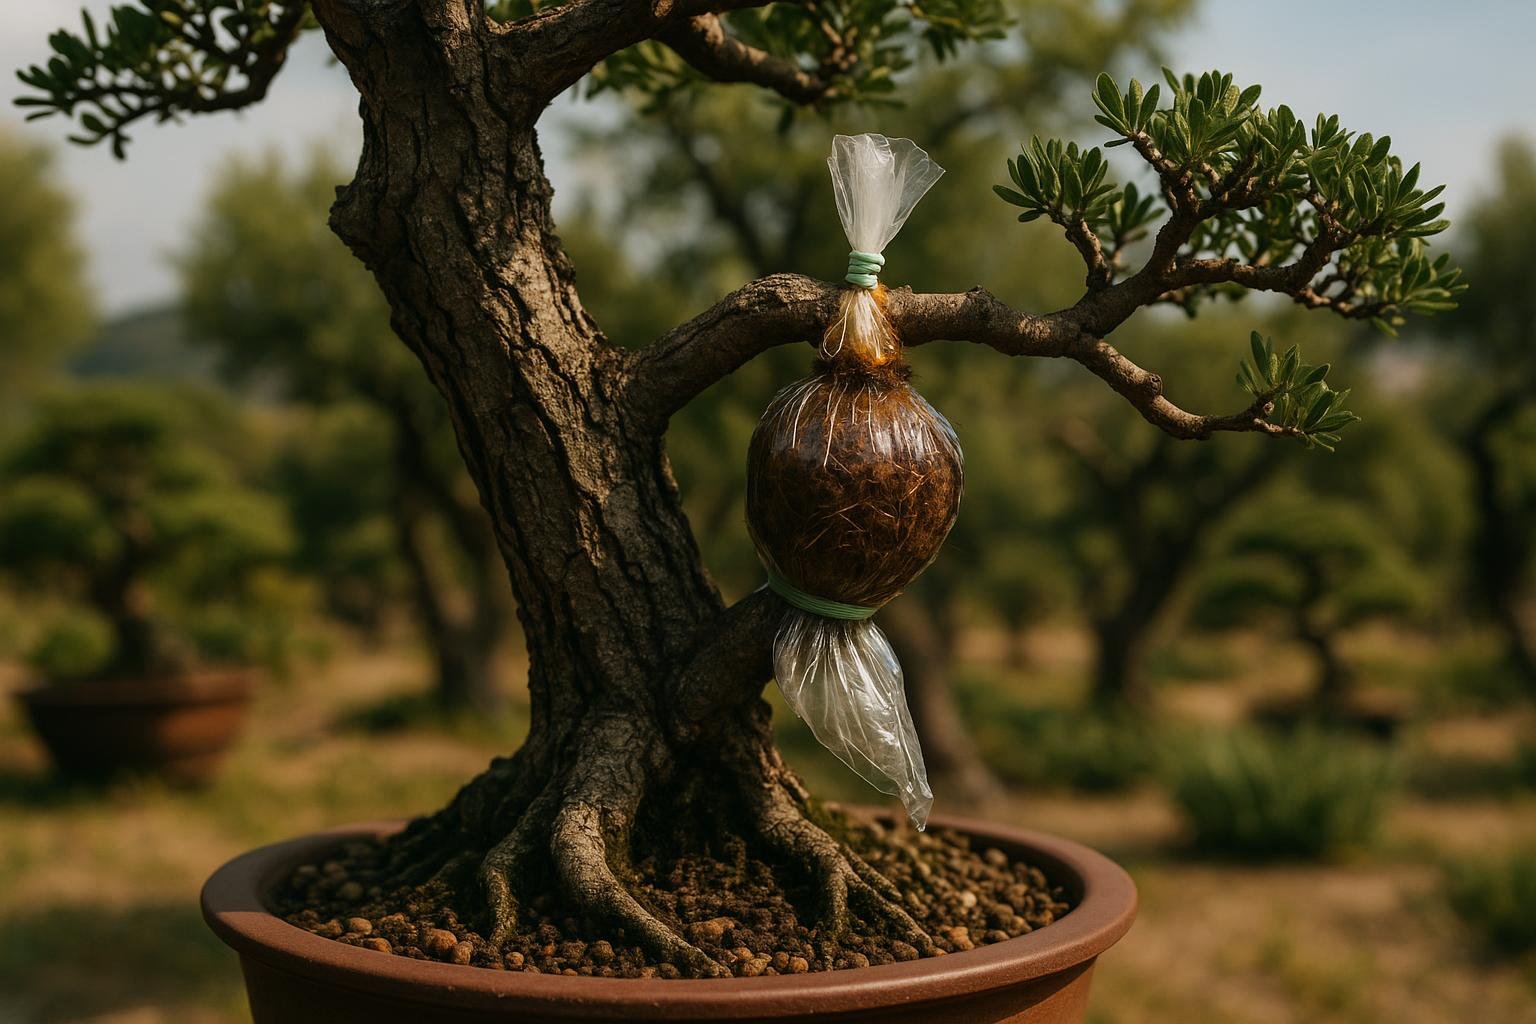
The first time I tried air layering bonsai I almost talked myself out of it. The idea of wrapping a wound around a living branch and hoping it grows roots felt close to magic, and the trees I wanted to try it on were not the ones I could afford to ruin. After more than twenty years cultivating bonsai in Southern Italy, I now consider air layering one of the most reliable techniques I have in the workshop.
The reason I keep coming back to it is simple. When a tree has good branches but the trunk base is wrong, or when an old garden tree has the perfect taper above the soil but you cannot dig it out, air layering lets you grow new roots exactly where you want them. The original tree stays alive, the new tree comes out with the bark and movement you chose, and nothing gets wasted.
This article is about how I do it in a Mediterranean climate, with the species I have learned to trust, the materials I keep on the workbench, and the mistakes I made early on so you can skip them.
What air layering is and why it works on bonsai
Air layering, called margotta in Italian, is a technique that forces a branch or a section of a trunk to grow new roots while still attached to the parent tree. The principle is straightforward: you interrupt the downward flow of sugars by removing a ring of bark, wrap that point in damp sphagnum moss, and the plant responds by pushing roots from above the cut.
It works because the carbohydrates the leaves produce cannot travel back down past the wound. They accumulate above the ring, and the tree, sensing it has been amputated below, treats the wound as the new base and starts forming root primordia.
For bonsai, this is gold. You can take a section of trunk that already has bark character, taper, and movement, and turn it into a separate tree with roots emerging exactly where you decide. No long wait, no Frankenstein nebari. Just the part of the parent tree you wanted.
When to do air layering in a Mediterranean climate
The window I use in the Italian South opens in mid to late May and stays open through the first half of June. The tree is in full vegetative growth, the sap is flowing strongly, and the days are long enough for the plant to put energy into root formation.
Earlier than that the soil is still cool and the plant has not yet committed to summer growth. Later than mid-June the heat starts to dry out the moss faster than the roots can establish, and the success rate drops.
In my experience, June 1st is roughly the latest safe date for an air layer that will produce roots strong enough to separate by autumn. Anything started in July is asking for trouble, especially in coastal areas where the sun beats down on the moss ball for hours.
For evergreen tropicals like ficus, the window is different and much wider. Those can be air-layered any time the temperature stays above 20°C consistently. But for temperate species, late spring is the sweet spot.
Best species for air layering bonsai
Not every species roots equally well. After years of trial and error I have a mental list of how readily different trees take.
Easiest, almost guaranteed: Ficus retusa, Ficus benjamina, Olea europaea sylvestris (wild olive), Ulmus parvifolia (Chinese elm), Morus alba (mulberry), and trident maple (Acer buergerianum).
Reliable with a bit of care: Japanese maple (Acer palmatum), Chinese juniper (with patience, often two seasons), Carpinus turczaninowii, pomegranate (Punica granatum), and most prunus species.
Tricky and worth the gamble only on healthy young plants: black pine (Pinus thunbergii), needle juniper, beech. Pines can be air-layered but they take two years to produce usable roots, and the success rate is lower. For zelkova or any plant already in stress from disease, recent repotting, or weak growth, I would not bother.
My materials and tools
Nothing exotic. What I keep ready on the bench: a sharp grafting knife, long-fiber sphagnum moss (not the powdered peat substitute), clear cling film or thick clear plastic, rooting hormone with IBA, twist ties or aluminum wire, and a piece of black plastic or aluminum foil to wrap around the clear plastic.
Cheap knives crush the bark and the wound takes longer to heal cleanly. I sharpen mine before every session.
The moss gets soaked in clean water for at least an hour before use, then squeezed out so it is damp but not dripping. The clear plastic lets me see when roots appear without unwrapping. The black layer blocks light, because roots form better in the dark. If you want a deeper dive into substrate principles, see my guide to olive bonsai care, where the same logic about drainage and root health applies.
Step by step
Pick the spot on the branch or trunk where you want the new roots to emerge. Look for a section with healthy bark, ideally just below a node or a strong leaf cluster that will keep feeding the area.
With the sharp knife, make two parallel cuts around the branch, about one and a half times the diameter of the branch apart. So if the branch is 2 cm thick, the ring should be 3 cm wide.
Lift the strip of bark between the two cuts cleanly off. You want to remove not just the bark but also the green cambium layer underneath. Scrape gently with the blade until the wood underneath looks pale and slightly dry. If you leave any cambium bridging the wound, the tree will heal it shut in days and no roots will form.
Optional: dust the upper edge of the wound with rooting hormone. The lower edge does not need it. Then take a handful of damp sphagnum, squeeze the excess water out, and form a ball around the exposed wood. The ball should completely enclose the cut, with at least one centimeter of moss above and below the wound.
Wrap the moss ball in clear plastic, tight enough that the moss does not slip. Tie off the top and bottom with twist ties or wire. Then cover with the black plastic or foil to block light. Leave a small flap at the top of the clear plastic, just under the foil, so you can lift it and check moisture without unwrapping the whole package.
What to expect and when to check
For the easy species, the first roots usually appear within four to six weeks if the temperature is steady around 22-28°C. For Japanese maples and pines, expect eight to twelve weeks at minimum.
I check the moss every two weeks by feel. If it feels lighter than expected, I inject water gently with a syringe through a small hole in the plastic, then re-seal. Never open the wrap fully until you see roots.
The moment to act is when the moss ball is visibly filled with white or cream-colored roots pressing against the clear plastic. Some growers wait until roots turn brown and woody, but for bonsai purposes I separate when the root mass is dense and well-formed but still young and adaptable.
Separating and aftercare
When the roots look ready, choose a calm, overcast day. Cut the branch off below the moss ball with sharp shears, leaving a clean cut.
Without removing the moss, pot the new plant immediately into a free-draining bonsai mix. I use my standard 70/30 pumice-akadama mix for most species. The moss can stay around the roots as long as it does not dry into a hard lump.
Water thoroughly. Place the new plant in shade for at least two weeks. The leaves will look stressed for the first few days. That is normal. Do not fertilize for at least a month.
The parent tree, the one that donated the branch, needs care too. The cut should be sealed with cut paste to prevent infection, and the tree benefits from reduced fertilization until the next spring.
Common mistakes to avoid
The biggest mistake I see is leaving green cambium between the two cuts. The tree heals it back together and the whole effort is wasted. Always scrape until you see clean white wood.
Second most common: making the bark ring too narrow. A ring of less than one and a half times the branch diameter often gets bridged by callus tissue and the layer fails. Bigger is safer.
Third: using moss that is either too wet or too dry. Squelching wet moss invites rot. Bone-dry moss produces nothing. Damp like a wrung-out sponge is the target.
Fourth: starting too late in the season. An air layer attempted in July rarely succeeds in Mediterranean heat. Plan for May or early June. And last, the one that costs the most: separating too early. If roots are visible but sparse, give it another two or three weeks. A separated air layer with weak roots almost always dies during the first hot week.
Frequently asked questions
Can I air layer the trunk of a tree, not just a branch?
Yes, and this is one of the best reasons to learn the technique. You can transform a tall, leggy nursery tree into a much better bonsai by air-layering the upper portion where the taper and movement are best, then growing it on as a separate plant.
Does air layering hurt the parent tree?
Not significantly if done properly. The wound seals over within a season. The branch that was layered is removed, so the tree just loses one branch.
Why do my air layers callus over instead of rooting?
This almost always means cambium was left in the bark ring, or the ring was too narrow. Re-do the cut carefully, scrape down to white wood, and widen the ring if needed.
Can I air layer the same tree twice in a year?
On strong species like ficus or elm, yes. On most temperate species I would only do one air layer per year per tree to avoid weakening it.
Is rooting hormone essential?
No, but it helps with the harder species. For ficus, olive, and elm I often skip it. For maples and pines I always use it.

Roberto Liccardo is a bonsai artist and nurseryman based in Calabria, Italy, with over 20 years of hands-on experience in bonsai cultivation, styling, and sourcing. He travels to Japan to select trees directly from specialist growers, and runs WeBonsai — an online nursery shipping handpicked bonsai across Europe. Passionate about both the living art of bonsai and the technology that brings it to a wider audience, Roberto combines traditional Japanese techniques with a modern approach to e-commerce, packaging, and customer care.